
Article 3 of 13
Sign up: the four steps
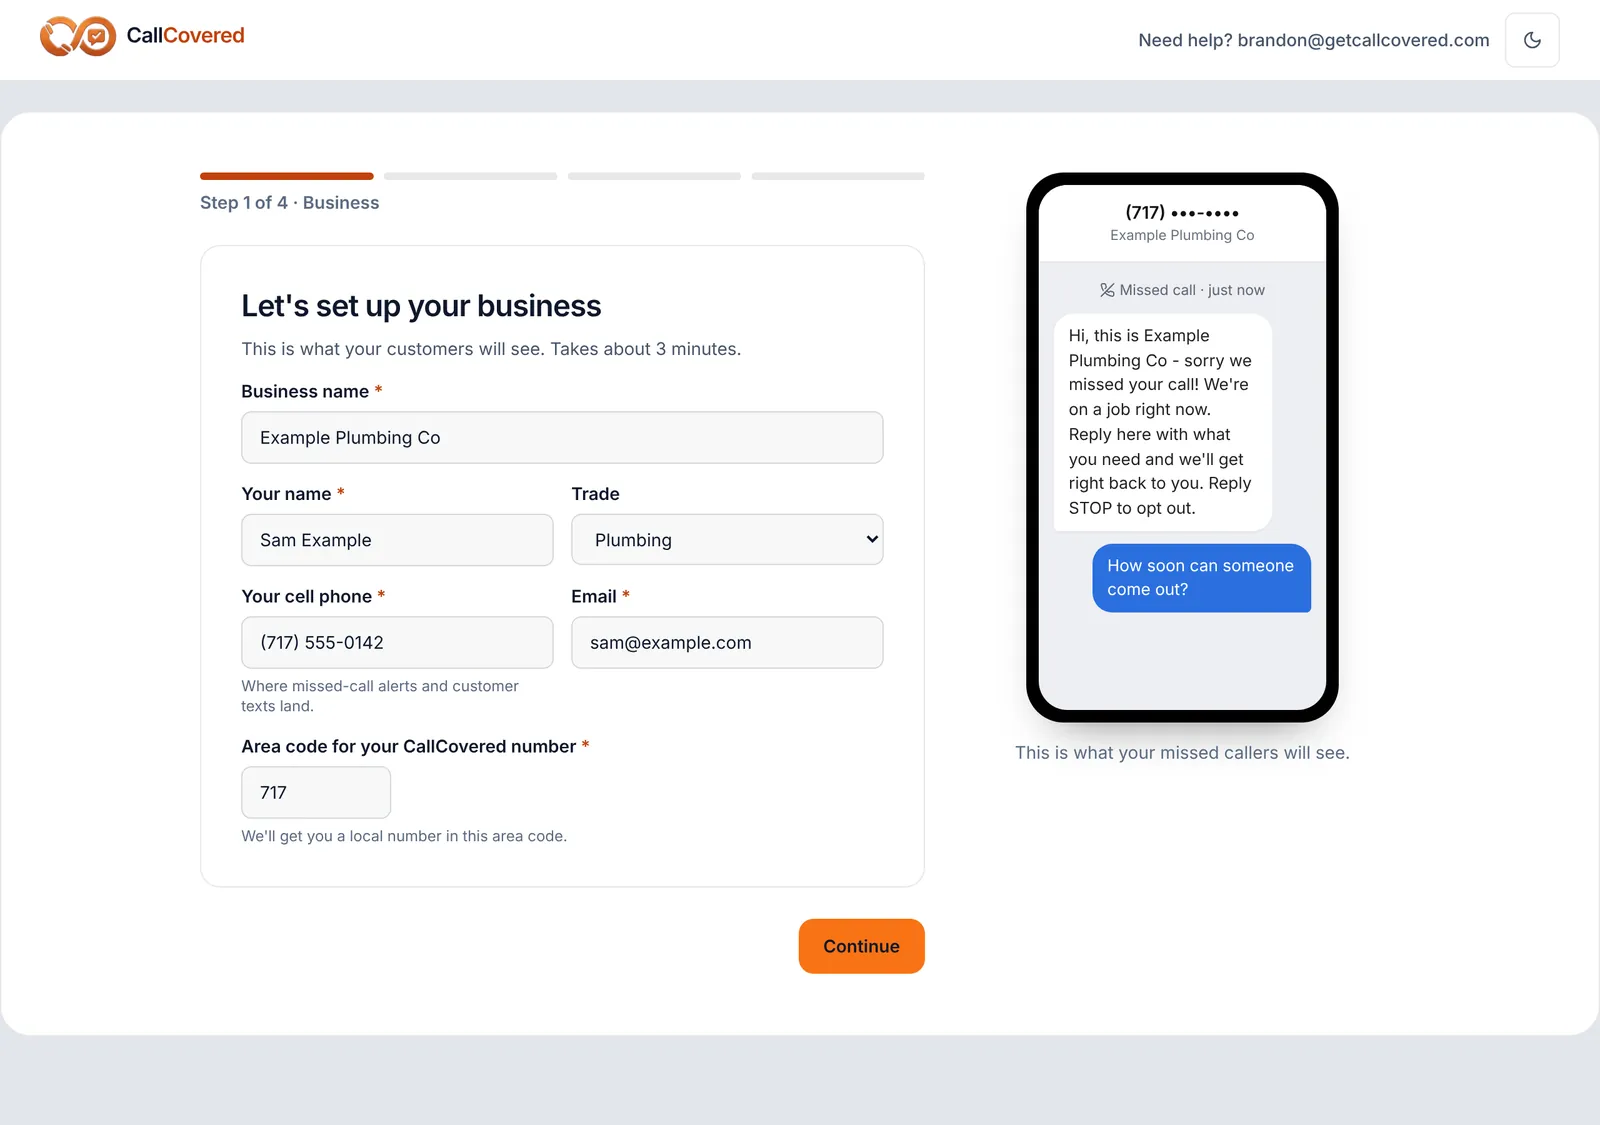
You sign up at getcallcovered.com/signup in four steps, then pay on a secure checkout page. Step 1 says it takes about 3 minutes.
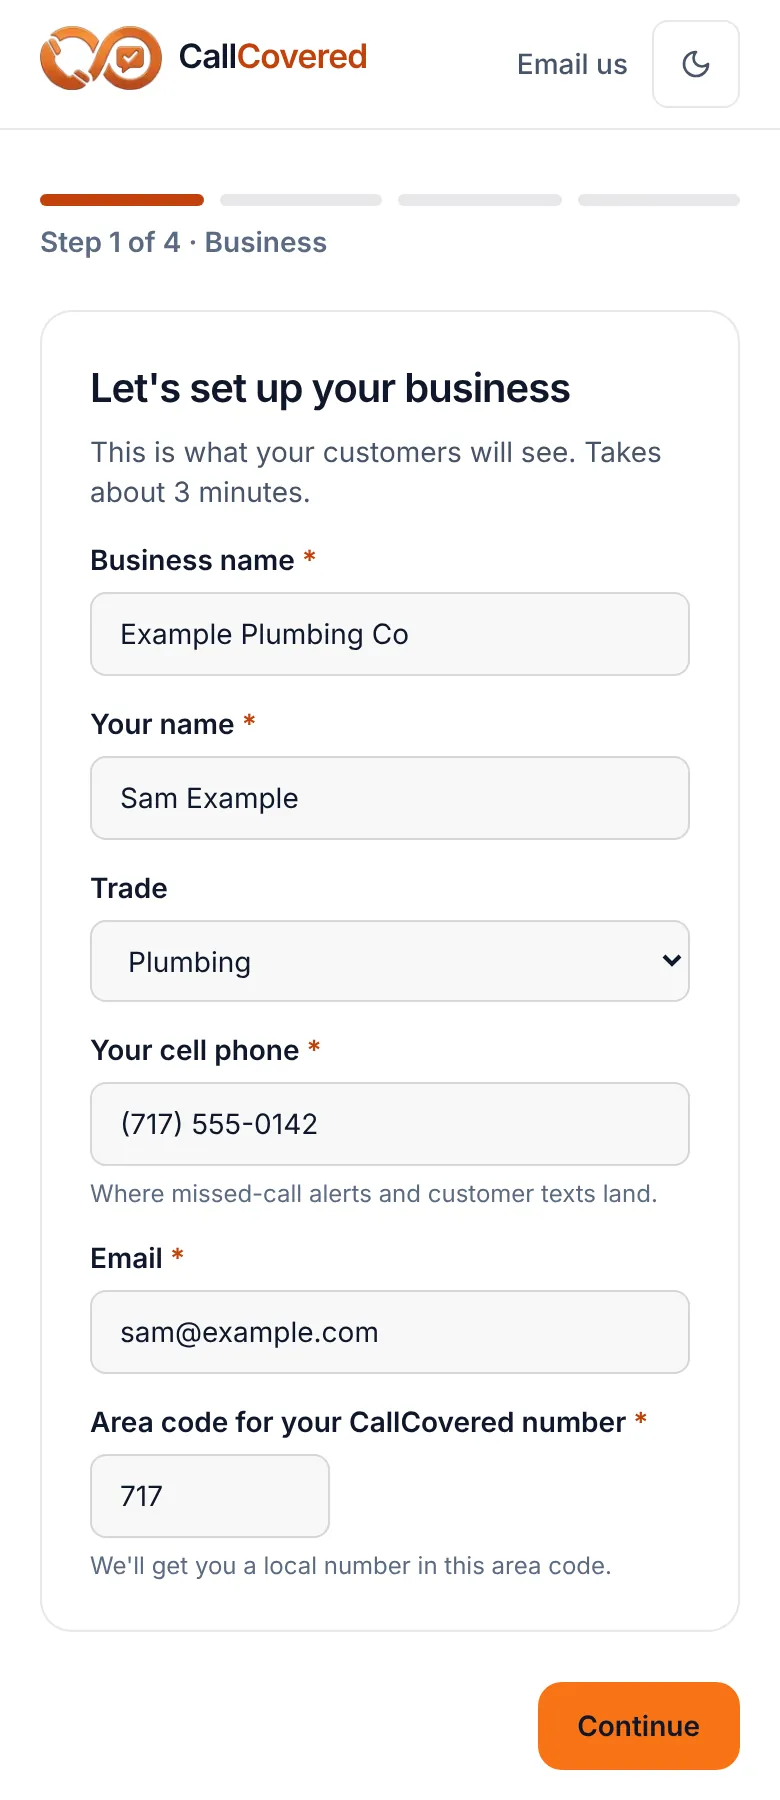
Step 1: Business. Enter:
- Business name. This is the name your callers see.
- Your name.
- Trade: Plumbing, HVAC, Electrical, Roofing, Landscaping or Other home service.
- Your cell phone. This is where missed-call alerts and customer texts land, and the phone your text commands must come from. It has to be a US cell that can receive texts. Checkout refuses a landline.
- Email.
- Area code for your CallCovered number. We get you a local number in this area code.
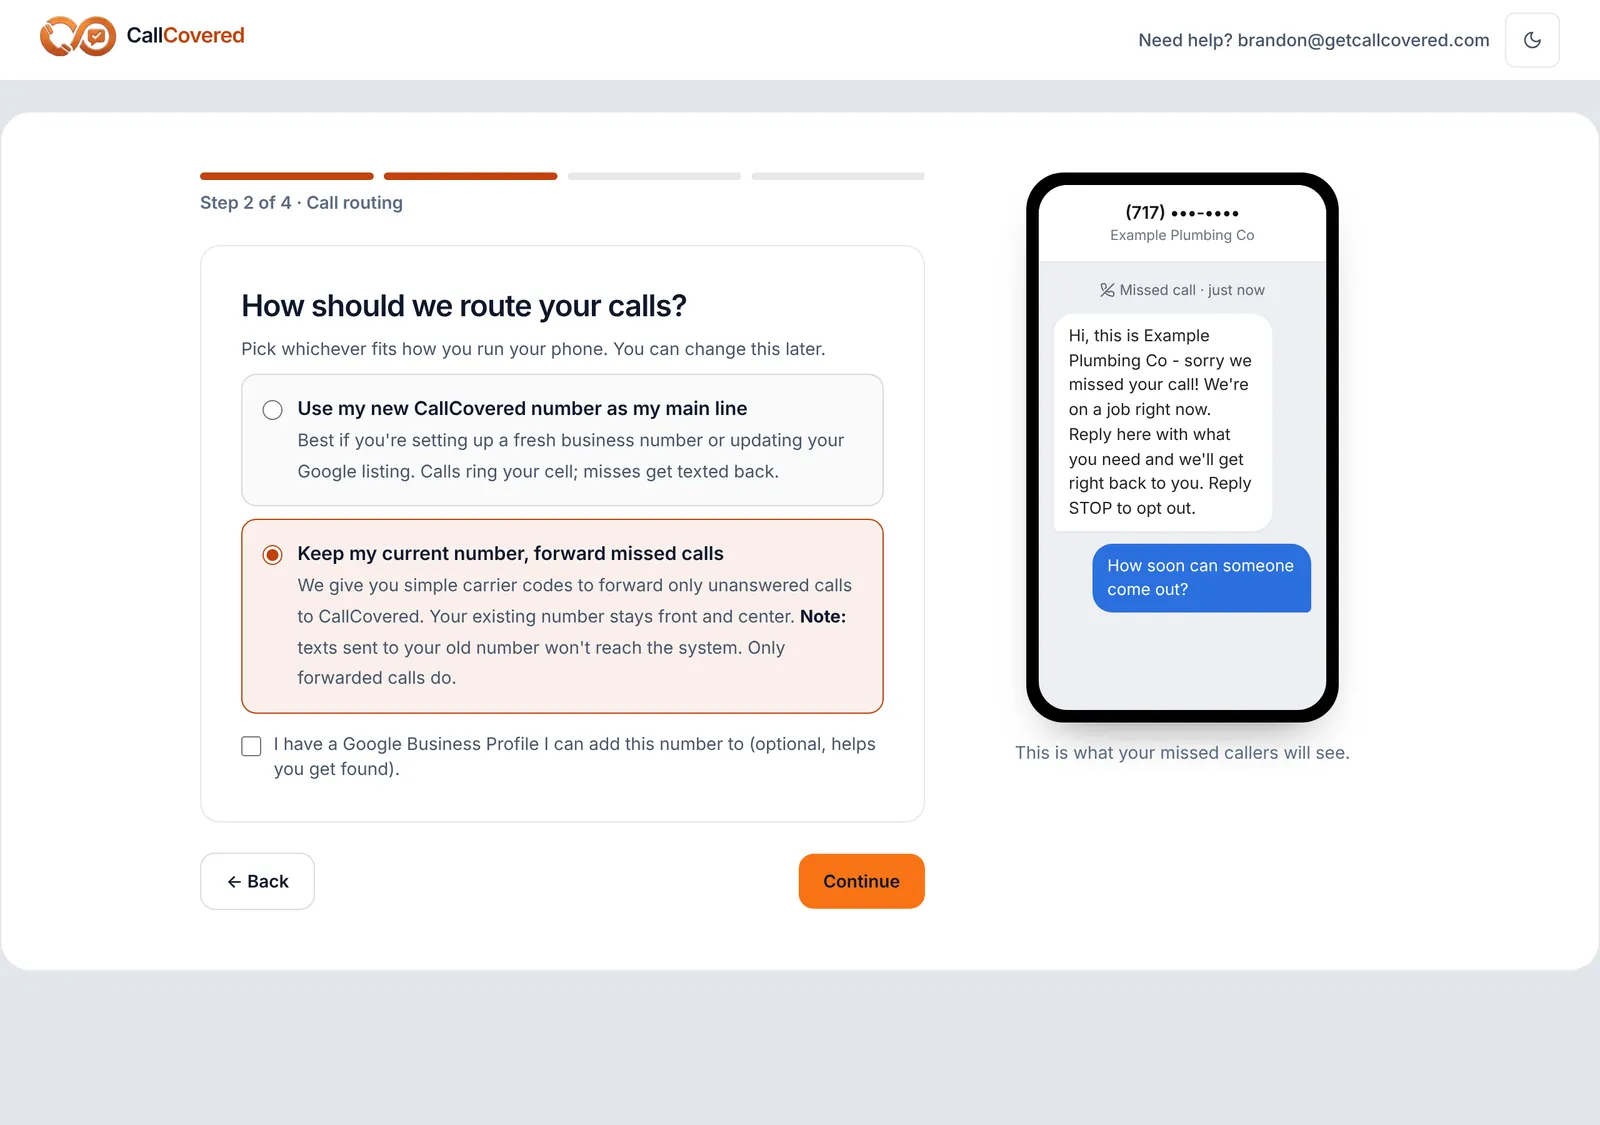
Step 2: Call routing. Pick one:
- Use my new CallCovered number as my main line. Calls to the new number ring your cell. If you don't pick up, the caller gets the text. Best if you are starting a fresh business number or updating your Google listing.
- Keep my current number, forward missed calls. You set conditional call forwarding on your existing line so only unanswered calls come to CallCovered. Texts sent to your old number do not reach the system. Only forwarded calls do. See "Set up call forwarding on your phone".
There is also an optional box to tick if you have a Google Business Profile you can add the number to. To change routing after signup, call or email us.
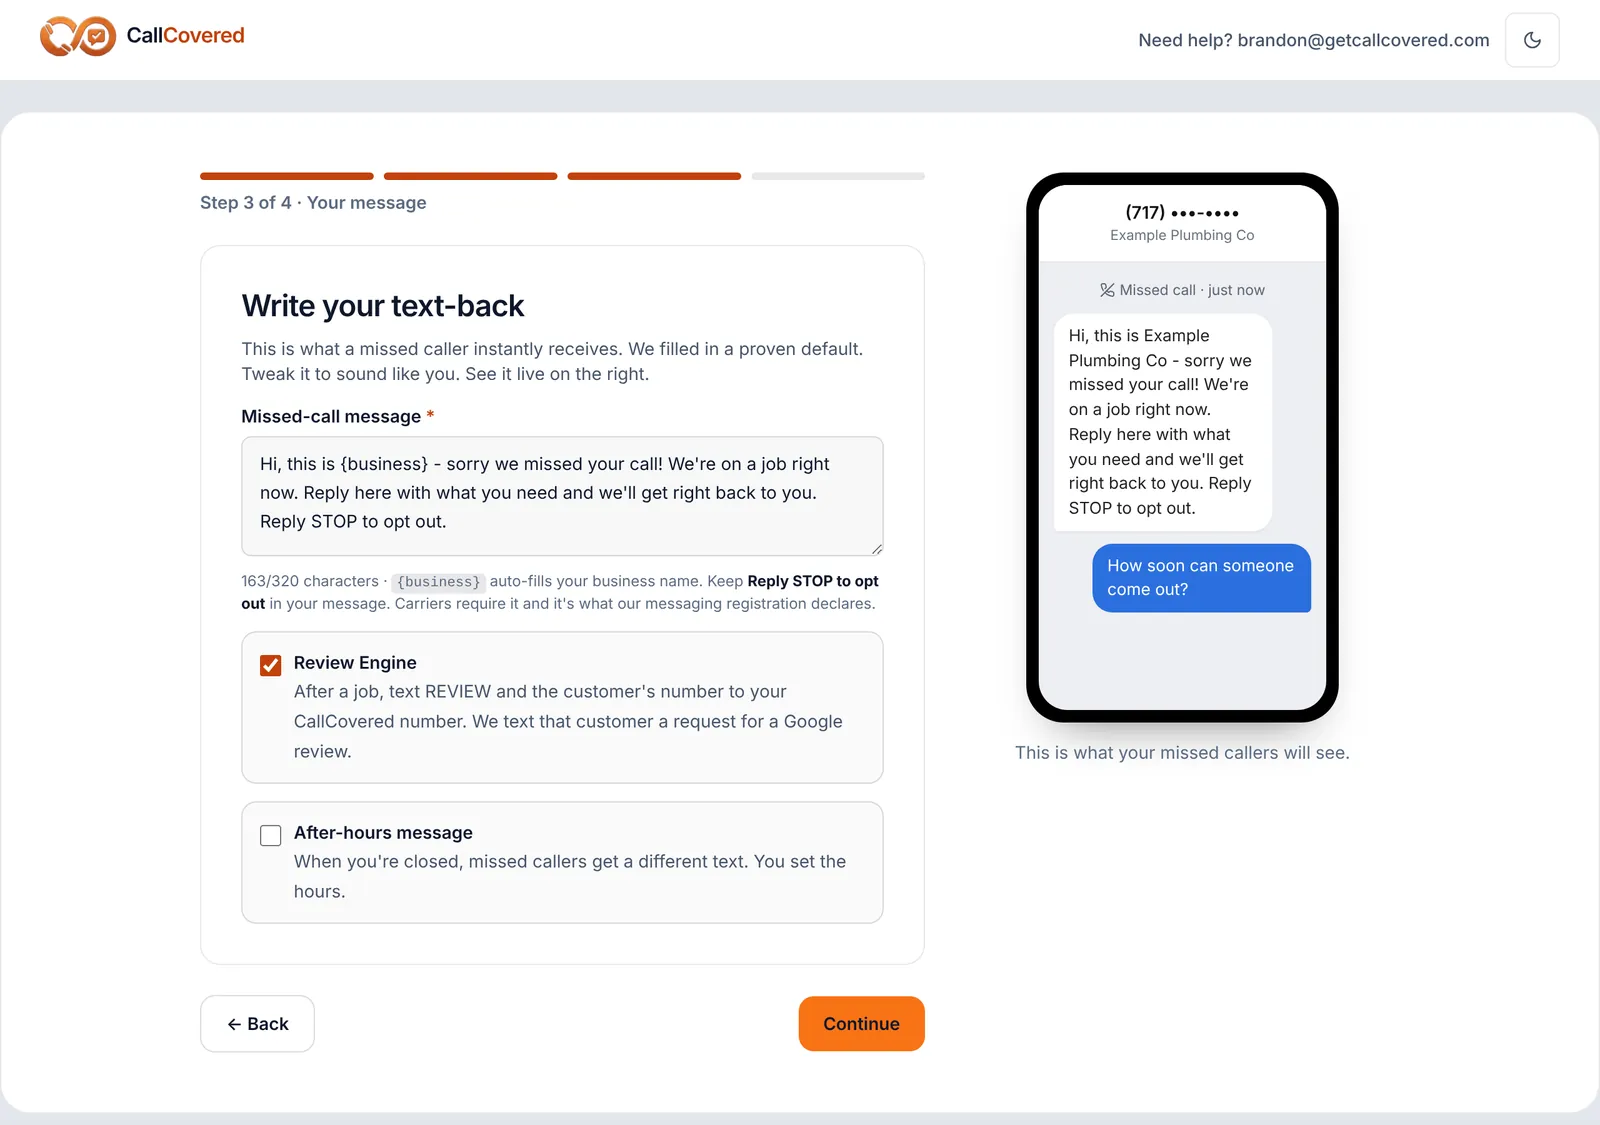
Step 3: Your message. Write the text a missed caller gets. The box comes filled with the default wording; the preview on the right shows it with your business name. With the default, a caller gets:
Hi, this is Mike's Plumbing - sorry we missed your call! We're on a job right now. Reply here with what you need and we'll get right back to you. Reply STOP to opt out.
- The limit is 320 characters.
{business}fills in your business name.- Keep "Reply STOP to opt out" in the message. Carriers require it.
Two switches sit under the message:
- Review Engine. On by default. It lets you ask a customer for a Google review by text when a job is done. See "Google reviews".
- After-hours message. Off by default. Tick it to write a separate text for when you're closed, then set your closed hours (7:00 PM to 7:00 AM to start), whether weekends count, and your time zone. You can change all of it later in Settings.
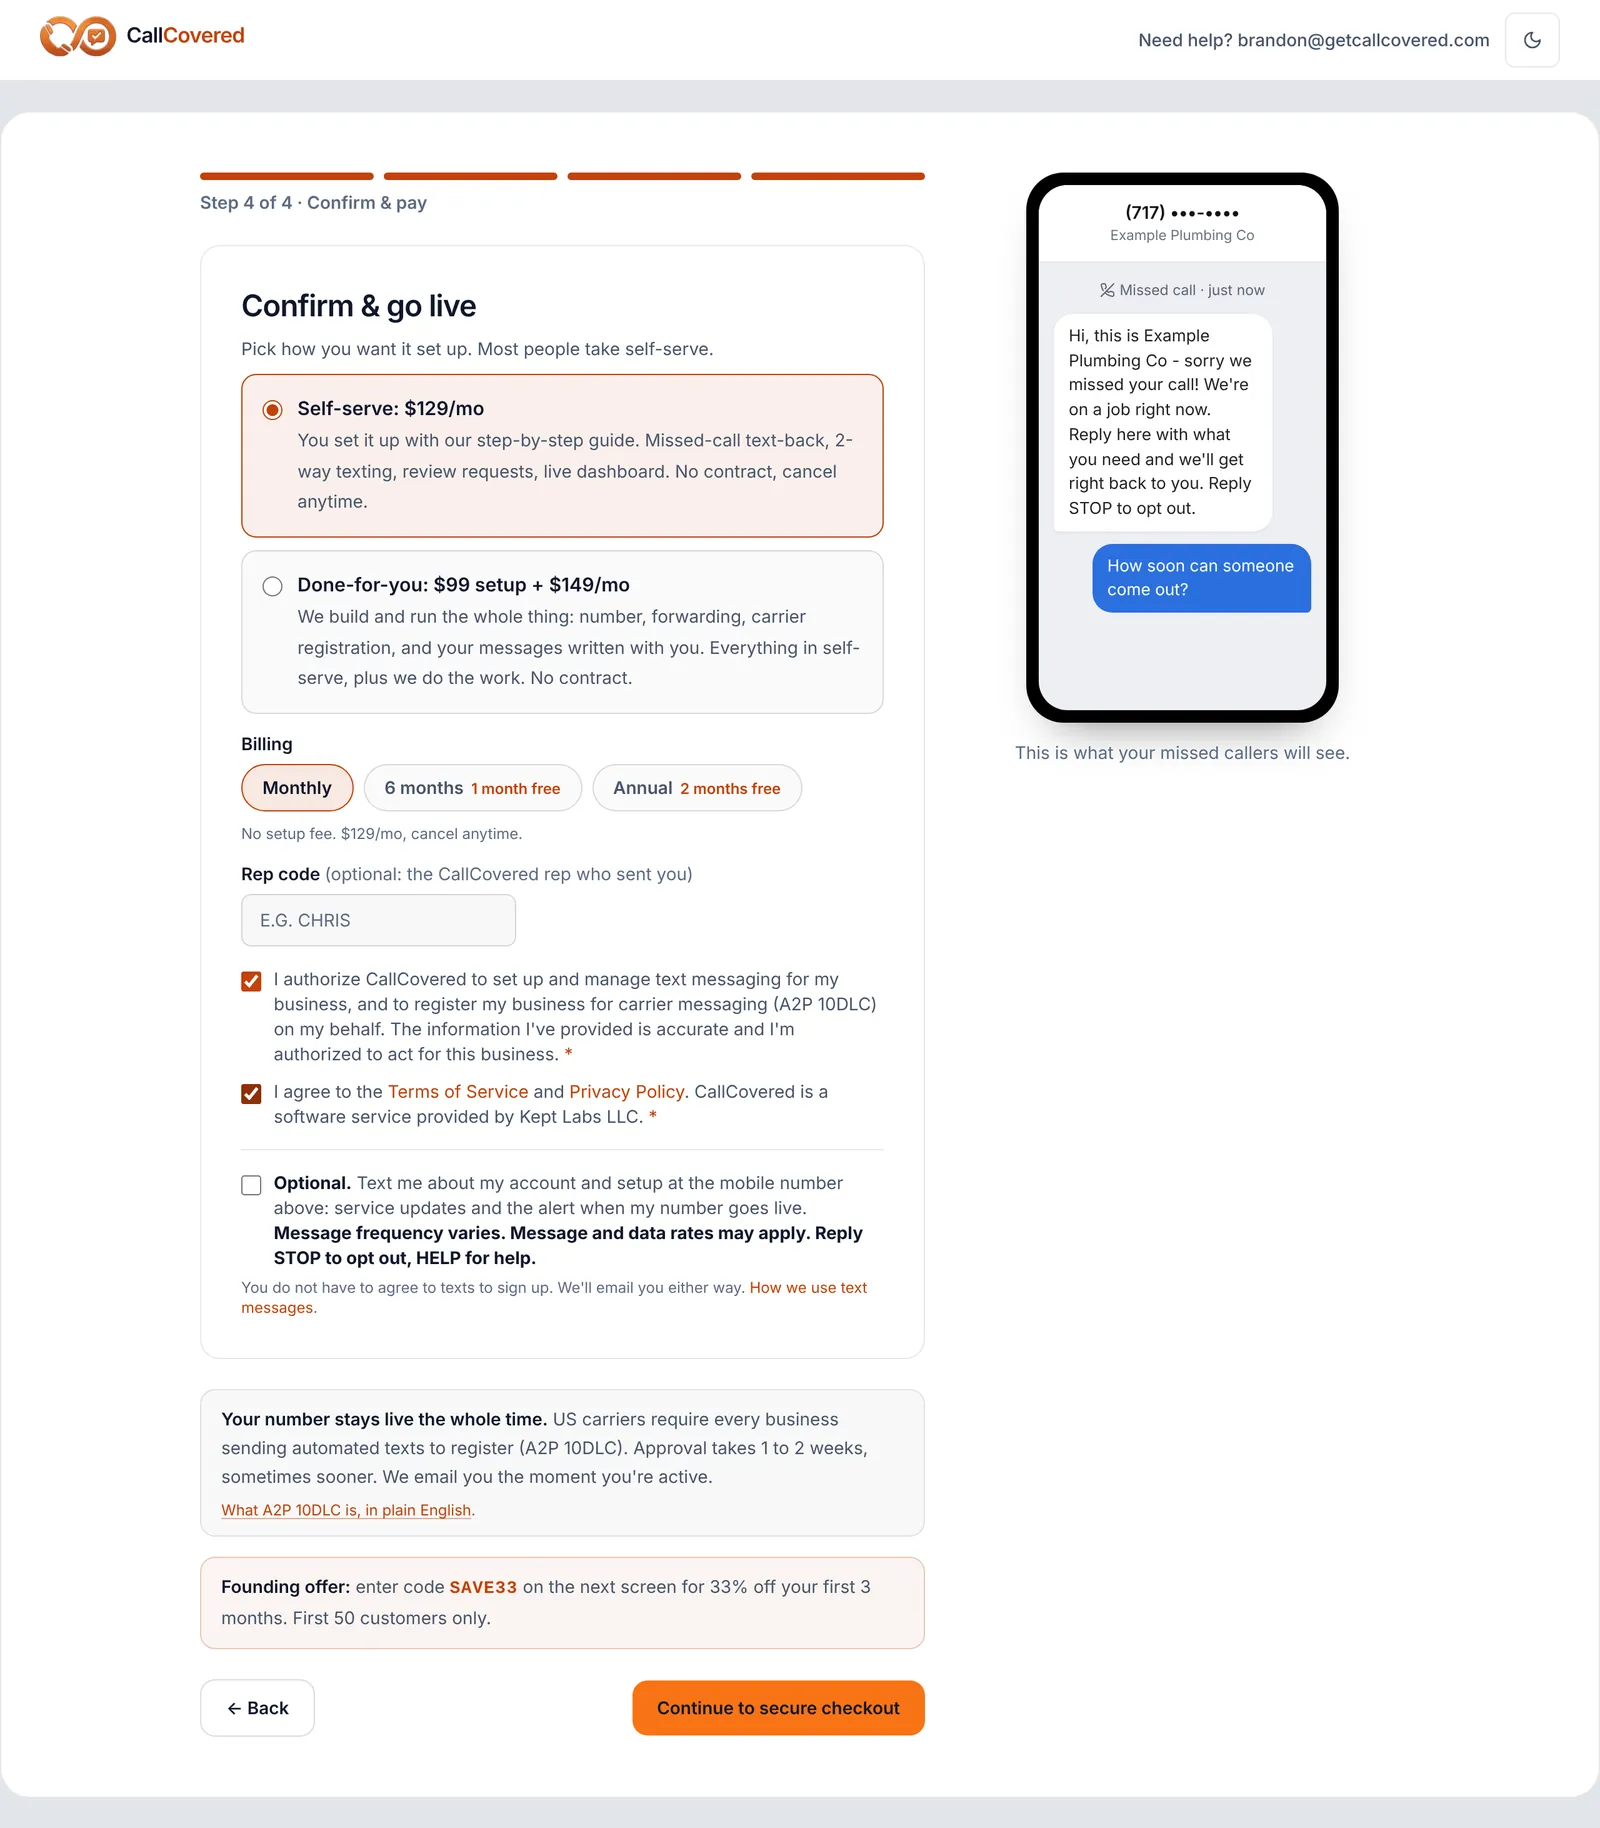
Step 4: Confirm & pay.
- Pick Self-serve or Done-for-you.
- Pick billing: Monthly, 6 months (1 month free) or Annual (2 months free). The line under the buttons shows exactly what you will be charged today.
- Rep code (optional). If a CallCovered rep sent you, their code may already be filled in and a bar at the top shows "Your CallCovered rep". The price is the same with or without one.
- Tick the two required boxes: that you are authorized to set this up and to have your business registered for carrier messaging, and that you agree to the Terms of Service and Privacy Policy.
- The texting box is optional. Tick it if you want account texts from us at your cell, such as the Monday summary by text. Leave it unticked and we email you instead. You can sign up either way.
- Tap Continue to secure checkout and pay. Enter
SAVE33there if you are on monthly billing.
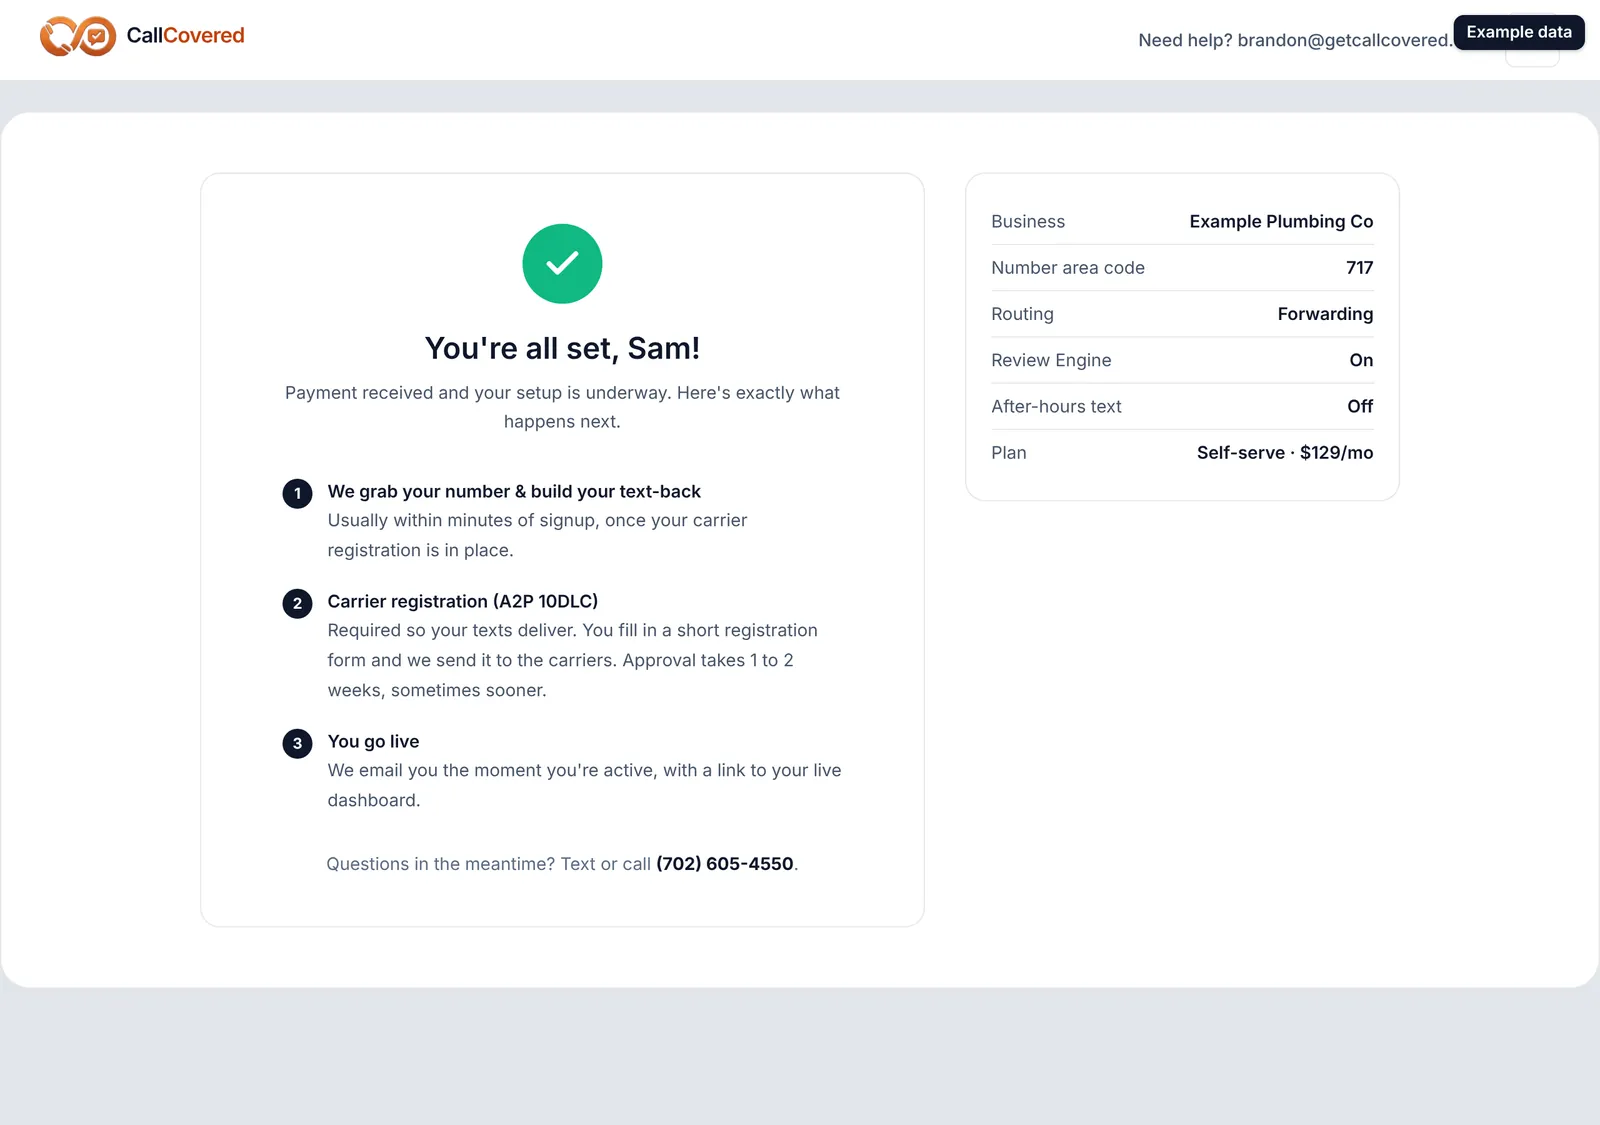
After you pay you land back on a "You're all set" screen that lists what happens next.
PreviousPlans, billing terms and the founding offerNext After you pay: your number, carrier registration and going live
Still stuck? Talk to a person.
Call or text the support line, or send an email.